
Build My Blog With Hugo
使用 Hugo 构建个人博客

Overview
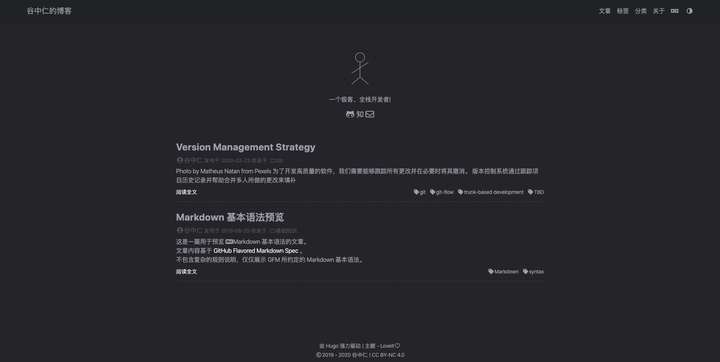
Hugo是一款基于 golang 实现的静态网站生成器。以其简单、易用、高效、易扩展、快速部署受到开发者的喜爱,比起 Hexo[1] 感觉更轻便。下图是我初步实现的博客截图。
安装
Golang
Hugo 是基于 Go 语言的,所以需要安装 go, 我的机器是 Mac, 所以直接用 homebrew 就搞定。
$ brew install goHugo
$ brew install hugo生成博客站点
$ hugo new site blog安装 LoveIt[2] 主题
$ cd blog
$ git init
$ git submodule add https://github.com/dillonzq/LoveIt.git themes/LoveIt
配置 config.toml
将themes/LoveIt/exampleSite/config.toml copy 到 blog 根目录,并根据需要修改里面的配置。
注: 需要将 copy 过来的 config.toml 里的 themeDir 由
../..改为./themes
优化模板
Hugo 生成的 markdown 文件都是由archetypes/default.md生成的, 所以我们可以在模板里加入一些我们通常使用的文案和图片。 比如:
---
title: "{{ replace .Name "-" " " | title }}"
date: {{ .Date }}
draft: true
author: "谷中仁"
authorLink: "https://guzhongren.github.io"
description: ""
license: <a rel="license" href="http://creativecommons.org/licenses/by-nc/4.0/"><img alt="Creative Commons License" style="border-width:0" src="https://i.creativecommons.org/l/by-nc/4.0/80x15.png" /></a>

tags: [""]
category: tool
hiddenFromHomePage: false

cover: ""
coverPreview: ""

toc: true
autoCollapseToc: true
math: true
comment: true
---

## 引用
生成文章后,直接更新需要更新的字段,如标签(tags)和分类(categories)等,然后在中间直接写文章就可以。
上传到 Github
$ git remote add origin git@github.com:guzhongren/guzhongren.github.io.git
$ git add .
$ git commit -m "init"
$ git push -u origin master
创建 blog分支
在 Github 上个创建 blog 分支。我们的博客都会在 blog 分支
创建PERSONAL_TOKEN, 或者 Deploy Token
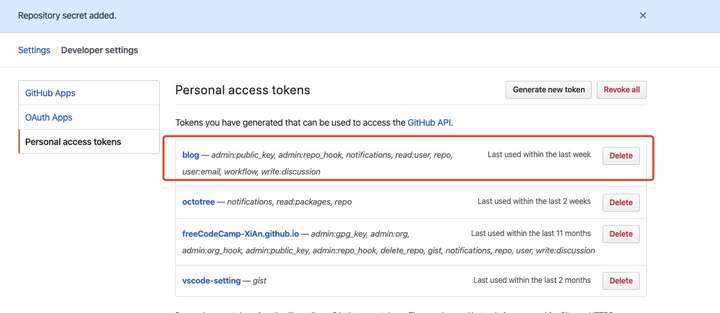
我们在 Developer settings[3] 以 PERSONAL_TOKEN 为例。
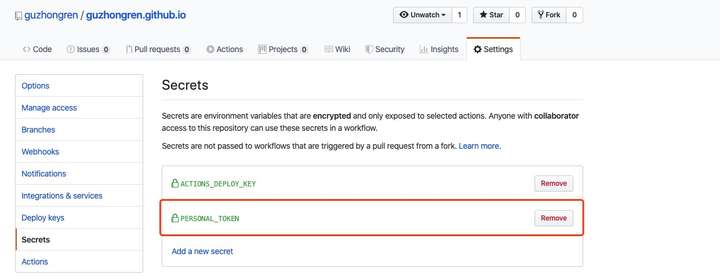
然后在项目设置的 Secret 中用PERSONAL_TOKEN添加
自动化部署配置
既然博客基于 github, 那么我们可以直接用 Github Actions[4], 在项目页点击Actions, 创建一个 Workflow, 其内容大致如下
name: github pages

on:
  push:
    branches:
      - blog

jobs:
  build-deploy:
    runs-on: ubuntu-latest
    steps:
    - uses: actions/checkout@v1 # 必须用 v1 ,v2 不支持 submodule
      with:
        submodules: true

    - name: Setup Hugo
      uses: peaceiris/actions-hugo@v2
      with:
        hugo-version: '0.64.0'

    - name: Build
      run: hugo --minify

    - name: add nojekyll
      run: touch ./public/.nojekyll

    - name: Deploy
      uses: peaceiris/actions-gh-pages@v3
      with:
        # deploy_key: ${{ secrets.ACTIONS_DEPLOY_KEY }}
        personal_token: ${{ secrets.PERSONAL_TOKEN }}
        publish_dir: ./public
        publish_branch: master
        user_name: guzhongren
        user_email: guzhongren@live.cn
写文章
为了更好的管理发布的文章,建议用 /year/mouth/article_name.zh.md 这种格式。也可用我写的 Makefile 命令
$ # hugo new posts/2020/02/first.zh.md
$ make post=first.zh.md
然后打开content/posts/2020/02/first.zh.md 进行文章编辑。
预览
在 blog 项目根目录运行如下命令进行预览
$ # hugo server -D
$ make pre
提交
提交到 git 中,暂存起来
$ make commit message=feat(post): 发布新文章或者用如下命令
$ git add -A
$	git commit -m feat(post): 发布新文章
发布
将本地更新提交到 github 上, 会自动触发 actions 然后进行构建,构建完成后自动将代码部署到
$ make pub或者用
$ git commit -m "first article"
$ git pull
$ git push
优化
在敲 hugo 相关的命令的时候比较繁琐,有几个参数经常会敲, 所以使用 Makefile 优化一下,上面有些命令就是在此定义的。
post = default.zh.md
message = git commit
Year_month = $(shell date +"%Y/%m")

new:
	hugo new posts/$(Year_month)/$(post)

pre:
	hugo server -D

commit:
	git add -A
	git commit -m "$(message)"
pub:
	git pull
git push- new: 创建文章
- pre: 写文章时预览
- commit: 提交到本地暂存区
- pub: 发布文章
尽情享用吧。..🎉🎉🎉🎉🎉
参考
- Hexo: https://hexo.io/
- LoveIt: https://github.com/dillonzq/LoveIt
- Developer settings: https://github.com/settings/tokens
- Github Actions: https://github.com/features/actions